We're Goin' Places!

Showing posts with label eyes. Show all posts

Tuesday, August 25, 2015

Long Live the Rimmel Scandaleyes Eyeshadow Stick!

Hi guys! Long time no talk! Turns out my nine year old being home for the summer didn't offer me quite the amount of time to blog that I'd hoped. But, I'm looking to get back in the game, so let's get started!


These three beauties are the Rimmel Scandaleyes eye shadow sticks. And they were fair to good quality - the gray was hard to blend, the gold and purple went on like dreams. I've talked about them before, and I've even Instagramed about them:


and 


(And by the by, I'd be super pumped with a like on either pic. It's a public account, you don't even have to follow me to do it...although I'd be super pumped if you did that too, haha...)

I also noticed that I was seemingly always seeing these on clearance, but I could never put together why. A lot of times when you find makeup on clearance, they're either discontinuing that particular shade, or maybe changing up the packaging. But they seemed to be always marking these down. What was the deal?

I just logged on to the Rimmel site tonight, and figured it out. Long live the Rimmel Scandaleyes shadow stick, cause these guys are goners. Liners, shadows, cream shadows, they'll have them all. But if you're a fan of the chubby pencil format, you'll want to stock up, cause when they're gone, they're gone.

Like eye shadow? Me too! I talk about it all the time!

Saturday, April 4, 2015

It's Even Better Than I Thought!

Eye cream!

Aah, eye cream. My great love. It promises a lot of things I'm not sure it can deliver on (what is a peptide? Why is it important to my eye skin?), and yet, I can hardly resist one. I can think of five in my house, right this very second. Six, actually.

GoPure Naturals promises products that do what they say that they do, naturally, without any fillers like parabens and waxes. With consistent use of their eye gel, they promise that they can take two years worth of aging off your eyes in just two months!

Sold. Let's talk, right?

My eyes are...weird. Not baggy, necessarily. Like, anti-baggy. There's a hollow. And there's no crows feet, but I have a few wrinkles that go across the bottom of the eye. And no real dark circles to speak of.

GoPure Naturals "Youth Glow Eye Gel" promises to work on under eye circles, bagginess and puffiness, with noticeable results after one use, and removing 2 years worth of aging in a single month.

I happily ripped the package open right in my driveway, and slicked it right on. And I'll say - this pump is super high powered. One solid pump will dispense enough eye gel to do both of your under eyes, and the under eyes of six or seven of your friends! I've found pressing the pump down about halfway allowed for the amount of product that I needed, without any extra.

I smelled the smell of cucumber when I used this product pretty consistently. Which is funny, because I don't actually see cucumber listed in the ingredients. No dyes, or scents, other than the cucumber thing. The gel absorbs quickly, and wears well. I've tried similar products that dried to a shine (yes, shiny under eyes. That was what I was after...), but there's none of that here!

The official GoPure Natural website is here, and it can explain the science a lot better than I can.

I feel a little worried that I'm being a little vague with you guys, and I don't mean to be. If you can think of a question that you have that I'm not addressing here, leave your question in the comments section, and I'll be all too happy to talk about it with you!

But in the mean time, some pictures!


Product shot! Light, easy to read, and clearly identifiable. The last eye cream I bought came in a bright red tube. Believe, when you put them next to each other, this stands out!

And the Before and After shot, which was even better than I realized;


You guys! You GUYS! The wrinkles under my left eye are GONE, and the ones under my right eye are half of what they were. And this is after maybe a week of use. Oh my word. I'm sold. Everybody needs this stuff in their life, right now. I knew I liked the cream, but I didn't realize the results were so awesome. I'm in love!

GoPure Naturals is running a promotion on their website right now where you get 50% off your first purchase if you sign up for their email list. It's totally worth it. Go Pure. Go NOW! Go here!

DISCLOSURE: The good people at GoPure Naturals were kind enough to supply me with this eye cream in exchange for my opinions on it, all opinions are my own.

Later, beautiful!


Tuesday, February 24, 2015

I'm a hot disaster right now...

...and I don't blame Freeman, even though when you see the pictures, you'll see that it would have been easy for me to. Aah, let's go back to the beginning.

In December, I had Aveeno skin care recommended to me, because of the bumpiness of my forehead, that I've grumbled to you guys about before. So, couple the fact that I'm a beauty blogger (so I love a hot tip on some good product!), with the fact that I'm just generally a beauty junkie (so again - I love a hot tip on some good product!), I dutifully ask for some Aveeno skin care for Christmas.

And the bumpiness isn't getting better. And I'm starting to break out way more than I have in a very long time. The general rule of thumb with skin care is that when you're switching lines, you have to give it about a month to see genuine result from the product. So I didn't lose faith. But by the month mark, my skin is (to my eye) worse off than it was initially, and I'm not feeling great about things, so I check in with the dermatologist.

He puts me on a battery of lotions and washes - some over the counter, some not, and sends me on my way, with the instruction that my skin will be "red and irritated" and if it ISN'T, he needs to know, cause he's gotta change all the dosing.

Boy howdy, is it ever! Couple dry weather, with dry face wash, and it wouldn't take a lot to start a forest fire on my face. So I haven't worn makeup in about a week, cause honest, putting makeup on hurts.

But, I wanted to touch base with you guys, so I had to tell you about something I was up to, so I thought I'd give this guy a try today:


Freeman Coffee & Chai energizing eye mask. Promising to revive tired skin around the eye. I was pretty curious to try this one out.

First, I noticed that it wasn't nearly as scented as I'd expected. Doesn't "coffee and chai" sound like it would smell fantastic?! Unfortunately, in this particular instance, it doesn't smell like much. Which is funny for me to say, cause I usually grumble over stuff being too scented. I just really like the smell of coffee - and chai!

The package is thin, and you tear the top off, Where you get this fancy guy:


I still had on the flimsy plastic piece in this pic, it lays much more flush to the face when you take that off. But the pictures kind of sassy, so I stuck with it. Lay it down on the eye, wait 5 to 10 minutes (I hit up some Friends on Netflix...), peel off. Don't rinse, rub in any serum that remains on the skin.

Y'all, this burned. Now I did admit that my skin is a bit overly sensitive right now, but it burned.
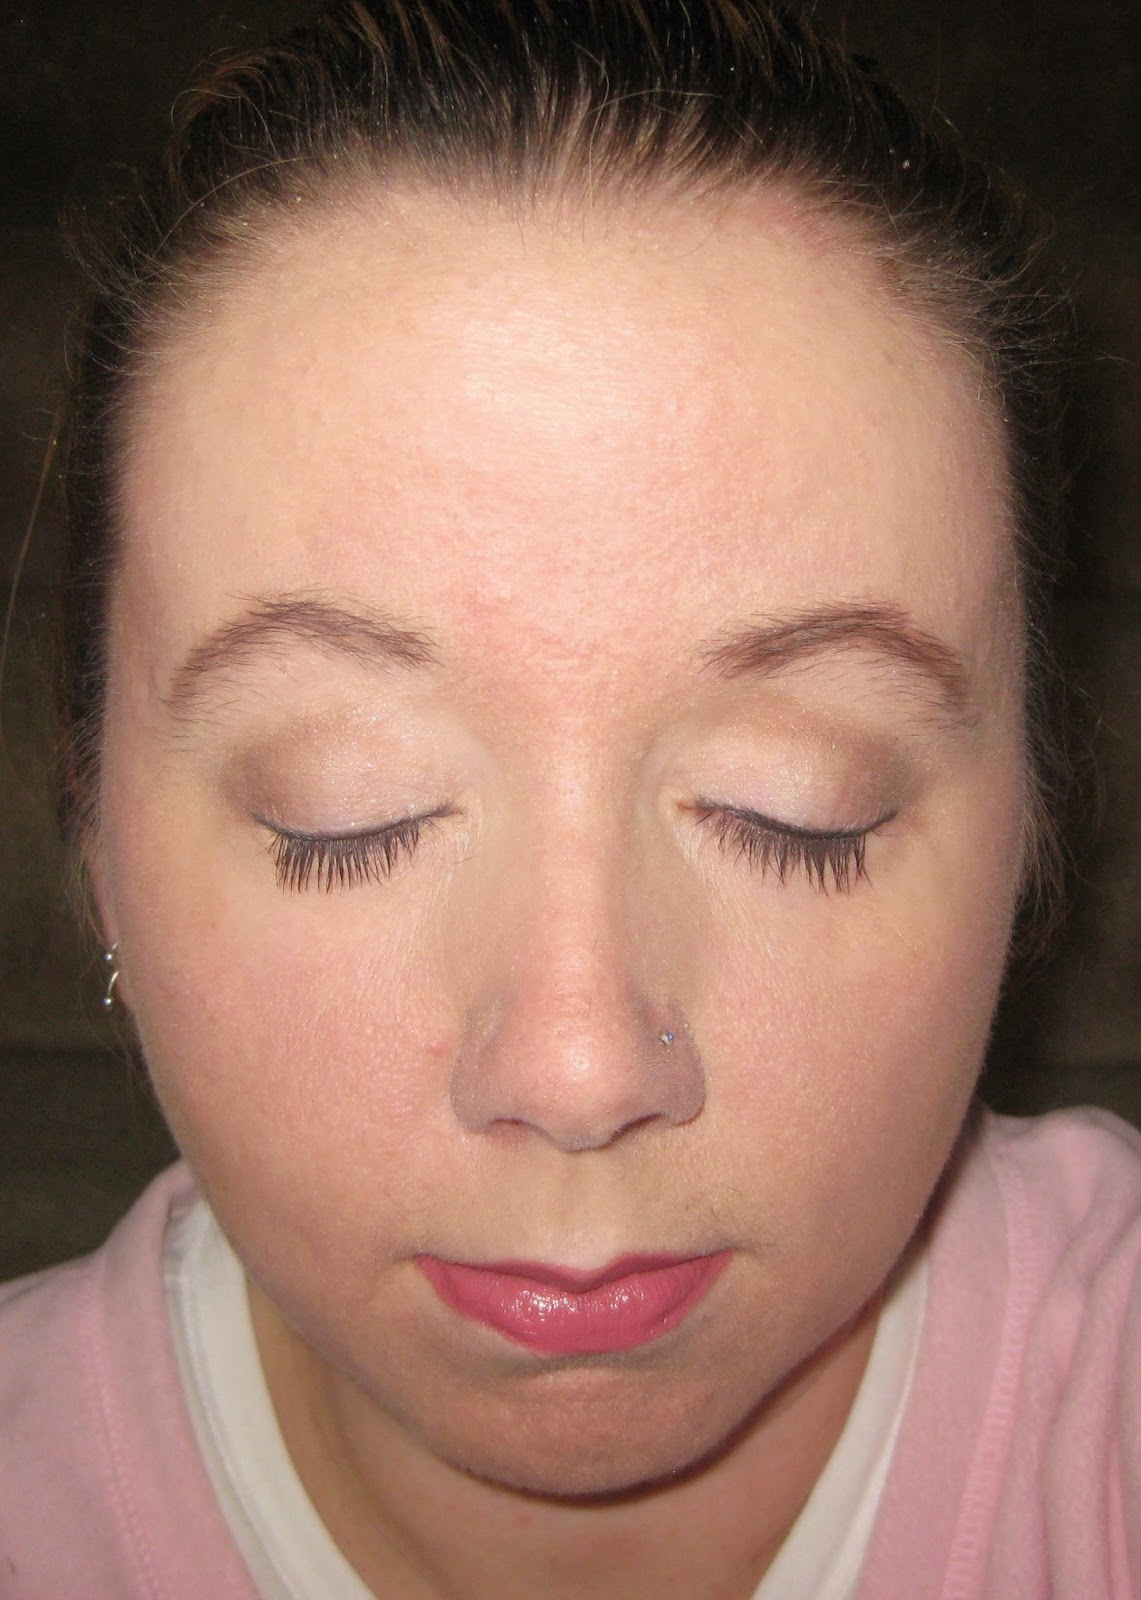
Before:


Before shot. And by the by, the dermatologists "red and irritated" plan is working well, at least I think so. I think my skin is smoothing out and clearing up quite nicely.

After:


Notice the red? In pretty much the exact size and shape of the eye mask?

Just to be sure that the burning and redness wasn't an allergy, I swabbed the inside of my wrist with the serum. Waited 15 minutes (well past the recommended use time). My wrist looked just as pale and wrist-ly as it ever does.

But - here's the trick. The redness did eventually wear away, and my eyes do feel much firmer and more taut than before. I know they don't especially look it, but I felt like I had "revived" skin around the eyes. Of course, the boost is pretty temporary, but this would be fun to whip out for a nice at home spa day, or maybe when you have a special event coming up, and want a little extra pick me up.

So when you see those burns...see how it'd be easy to blame Freeman for that? But I honest don't. The redness did eventually fade, and I was left with nice, bright, revived eyes. I can't hardly hate that.

This reads a little bit like I don't like it, but I actually do, a lot. Inexpensive, easy to use, and a nice, quick boost to the eye area? What's not to like?

Ooh! Quick announcement before I let you go!

Over the weekend, I added an Amazon bar to the bottom of the page. Anything that you purchase through that search bar, a portion of the proceeds goes back to your friendly neighborhood blogger (that's ME!) So if I review something that I'm so overwhelmingly enthusiastic about that you  can't help but want to try it, scroll to the bottom, and you can have your own in a snap. Or if I hate it, and you're convinced it just positively can't be as bad as I said, you can have one of those too!

These individually packaged Freeman masks are $3 at Wal-Mart, but if you don't have the time - or desire, for a Wal-Mart run, now you know where to go! :)

Thanks in advance for checking out the bar. And I'll see you next time, I'm sure with rested and revived eyes. ;)

Later, gorgeous!


Wednesday, February 18, 2015

Today I learned...

...that not all Shadow Softies are created equal.

On Monday, I tried out some Almay Shadow Softies, and it seemed to go pretty stellar. So I was kind of excited today to continue digging in to my collection. Today's shadows are "Honeydew" (which is green with a slight gold shimmer, exactly the color of a piece of honeydew melon), and "Hot Fudge", a matte brown, which also greatly resembles it's namesake. "Honeydew" doesn't get done the justice it's due in my pictures, it's quite pretty.

The beauty shots, as they were;


Got experimental with my camera angles, trying to do "Honeydew" some justice. Like I said, it's quite pretty, it doesn't get a fair shake in pictures.

So, this is a nice, kicky, "maybe if I wear bright colors, Mother Nature will get the hint and make it Spring!?" combination for today, right?


Notice the biggest difference from Monday? I didn't change a thing - same brand of shadows, same brushes, same primer, same everything I did Monday...significantly reduced color payoff. Mamma no like-y! There's some payoff from the Hot Fudge color for sure, but if I didn't tell you I was wearing Honeydew, would you know I was wearing Honeydew? No you would not...


My eyes are open, and you still wouldn't know the Honeydew was there. Fun to look at, maybe not as much to wear.


Duck face for comedic effect. :D

So, what I'm saying is this - I'm a fan of the Shadow Softies as a general rule. I obviously don't think that they're for those that want a particularly bold look. But if soft, neutral and natural is what you're after, you'll get along with these shadows well.

But, today taught me that all shadow softies are not created equal, and Honeydew might be the lone outcast from the collection. Sorry, honeydew.

See you tomorrow, lovelies!


Monday, February 16, 2015

Aww, I'm Such a Softie...

...for Almay Shadow Softies.

I was perusing the beauty section at my local Target, as any good drugstore diva is known to do on the weekly, and noticed that the Shadow Softies by Almay are on clearance. I had some of that "Oh my gosh, gotta buy 'em all!" panic, came home, tweeted Almay to find out if they were going to stop making them all together (they aren't...), and started trying to figure out how many I had needed. Almay's website lists that they make 12. I currently own 8. I think I got a lockdown on the Shadow Softies, no?

So let's see how they work!

These appear like a powder when you look at them, but have a softer than powder consistency. I'd always just used my fingers to apply, but found a good, stiff eyeshadow brush today, and seemed to have some luck there.

These colors are all wearable and soft in appearance, and blend really well together. No odd scents, nothing overly sparkly or anything like that. Even the most intense appearing colors will go on really soft. And I did apply these over primer, but even with the primer, they match what I know to be true about these shadows otherwise, as far as performance goes, so I don't even know that the primer made much difference.

My only objection, I guess, would be to their longevity. I applied these around 2 this afternoon, and I got probably a solid 5, maybe 6 if I'm being optimistic, hours worth of wear. By the end of 8 hours, they'd virtually disappeared from my eyelids. Which, if you're like me, and you're a part timer, isn't bad, cause it'll get you through a full day. If you're someone who needs your eyeshadow to hang with you for 8, 10, 12 hours...this isn't going to get the job done for you.

Let's go to the pictures! This particular pairing is "Lilac" and "Vintage Grape", with purple Kat Von D liner. My son picked out this color pairing, I had to bargain him down from the Lilac with a royal blue shade, that you'll see later this week! :O He's normally got a very good eye for color, but his eye was feeling a little wild today!


Eyes open... (Sidebar: that lipcolor is City Color in Flirtini, which came in my most recent Ipsy bag, and looked shockingly bright initially, but has quickly become one of my favorites...I think I've worn it every day since I got it.)


Eyes closed. Soft, delicate, pretty, and they blend together really nicely. Like I said, if I had to complain at all, it'd be with their longevity. 


During the warm months, I like to actually go outside and let the sun be the natural sunlight. Today, it was record breaking cold, so I didn't go outside, but the sun light seemed to be pretty strong, so I decided to take a picture in natural light, and see what I got there. So this gives you a little bit more of an idea of what these would look like in natural lighting.


Trying to get a little arty with the product shot, haha. That's Lilac closer to the camera, and Vintage Grape farther away. Small containers that fit well in to your hand, and would no doubt go well in to a Z Palette if that's your thing.

I think that the best market for these shadows is probably someone who has a little bit of color bravery about them, but for the most part, wants to be able to rock a soft, clean, natural look. If that's you, then you will enjoy these shadows. In fact, not only will you enjoy them, they'll probably become your new favorites. If you are someone who thinks nothing of wearing lime glitter to your eyebrow, and needs your shadows to rock long in to the night, you should probably keep looking, you haven't found your new favorites here.

Me personally, I'm somewhere in the middle. I like these a lot. :)

Later, my loves!

Wednesday, November 19, 2014

Wet N Wild Wednesday!

Today, I reviewed a 5 pan eyeshadow set from Wet N Wild, called "The Naked Truth". I also forgot to take a picture of it in good light, and wanted to do it justice, so I'll have to add that tomorrow.

As the name would suggest, this is a neutral palate, with colors ranging from a shimmery nude, on to a copper shade with flecks of gold glitter, that was just kind of fun to look at. Like is typical for Wet N Wild, each shade is has the suggest application site embossed in it. I did it on their application tips. I don't get intimidated by much, but the contrast between the nude, and the copper, seemed a bit tough to get through.

I shouldn't have worried! These colors went on well, blended together easily, and looked terrific. I'm now...seven hours post application, and you can see the colors beginning to fade a little, but the look is still clean, and well put together.

Wet N Wild is one of those brands that when they hit the mark, they nail it, and they really hit the mark on this one. For the price point, this is as nicely put together a palate as you'll probably find.

The one thing that never fails to irk me about Wet N Wild though? The chips to my mani that I take opening up a new polish! Three safety seals is a bit much, right? I mean, for real. Three?

The chips to my mani aside, I recommend this shadow, very enthusiastically. For their price point, it's nicely pigmented, and a well curated selection of colors put together. Two thumbs up!

The pictures. This is over the Fergie "Take On The Day" primer. Kat Von D liquid liner. As for the things that look like wings - I'm working on perfecting my wing technique. It's not great (this one was a little bit of an uneven line), but I'm getting there. :D


Right? That's a solid group of colors, for their price range. Do recommend! Will update again with the picture of the shadow, when I can get it in good lighting.

Later, lovelies!

Monday, November 10, 2014

Alright, long time no chat!

Thanks to a case of the writers block, and then a case of the forgetfulness (hey, it happens), it's been a while since we all talked, but I'm back, baby!

I own weird quantities of Almay eyeshadow. Almay doesn't put out coupons a lot, but when they do, they don't play around. And as a result, I own a lot of Almay eyeshadow. I've spoken about some of them, here. And here. And I'm back for another round!

This time, we're on pressed powder shadows. The Almay I-Color kits come in three speeds - Bold Nude, Shimmer, and Smokey. As it happens, I don't own any of the Bold Nude sets, but I do have some of the other two to show off. Because I believe, as I've pointed out before, the Almay theory of matching eyeshadow to your eye color is just a neat advertising gimmick and not much more, I actually own a wide variety of color choices.

The colors in question:


Top Left is the Shimmer-I kit, for blue eyes. Silver, a very highly pigmented navy, and light pink. This navy is by far the most pigmented of the three, and is no small trick to blend in! Almay, as you'll notice, lays out the color in a possible suggested wear pattern, if you're not terribly adept at smokey eyes.

Top Right is the Smokey-I kit for brown eyes. A bronze, a purple and gold color. This trio would probably be the one I'd be the most likely to buy in the group, just based on the colors. If I were shopping on impulse. Which I do from time to time. :D
Bottom Left is the Shimmer-I kit for hazel eyes. I like this kit a lot, because I've never seen anything like that green. Green, black and a gold toned white, and this one is VI. VID. Don't wear this if you don't want to stand out!

Bottom Right is the Smokey-I for green eyes. I like this one quite a bit too. Plum, a taupe color, and a lighter pink. This is probably the one of the group that gets me the most compliments when I wear it out.

Speaking of which, I also took pictures of me, in these eyeshadows. Each is applied over the Fergie for Wet N Wild's "Take On The Day" Primer.


Blue eyed kt. Silver across the lid, navy in the V, pink across the brow bone.


Brown eyed kit. I used the purple across the lid, bronze in the crease, and white on the browbone. See what I mean here - if I were to just go grab some Almay eyeshadows, ignoring their blue eyed/green eyed/whatevers, this is the group I'd be the most likely to purchase.


Green eyed kit. I wore this Friday night. I used green across the lid, and black in the crease. Man, I was having a great makeup day, probably the best smokey eye I'd done in some time. Then it dawned on me that a forrest green and black smokey eye was probably a smidge intense for a hockey game (we had seats in my husband's company box seats for the hockey game that night...), and I should probably dial it down. So in a stroke of genius, I took my "smudge brush", loaded it up with the golden white that comes included in the kit, and patted it over the top of much of the green. Dialed down the intensity, and made me look like a blending genius at the same time. :D Probably still far to intense for a hockey game, but whatever. Own it, girl! LOL!


This is the hazel eye kit, and this is the one I get the most compliments on. The taupe across the lid, plum in the crease, and little bit of the pink patted over the top, and along the brow bone. As a sidebar, I'm wearing ELF liquid eyeliner pencil in this one, and I think I love it. The line isn't quite as thick as I'd like, but that's probably my issue. If you can use a sharpie, you can use it. I recommend it - especially for only $1!

So with my other mass Almay reviews, I could kind of narrow it down to my "Keepers", but here...I got nothin'. These are high quality shadows, especially for the price point. Nice color payoff, richly pigmented (in the case of the navy in the blue eyed kit, almost annoyingly so...), long lasting. Great value for the price - which is between $4 and $8 USD depending on where you shop, and whether or not you find on sale.

I recommend all of them - buy according to your eye color if you like. Buy according to whatever colors strike your fancy (I kind of did...), but buy early, and buy often. :D

In a couple of these, it looks like I might have some filter action going on, but to the best of my knowledge, I do not.

See you soon, lovelies!

Like Almay? Me too! I talk about it all the time!

Monday, October 20, 2014

Bite Sized Reviews of Rimmel!

We're talking Rimmel Scandaleyes eyeshadow sticks!

I talked about one of these a little bit once before, here, and had a real Murphy's Law type of experience with it, so I was hopeful this one would go different.

I used two of the colors, Bulletproof Beige. Bulletproof Beige is a nice, shimmer gold, that if you're fair skinned, could easily double for a highlighter. Then we revisited my old nemesis, Paranoid Purple, a matte royal purple, which is also the one I had so much trouble with in the post that I linked.

Pleasantly, the trouble I had was not duplicated. I had no trouble getting the lid off, no breakage, no nothing! Great!

These are uber-simple to use - if you can use a crayon, you can use these. I was interested to see how well multiples blended together though. Awesomely, as it turns out. I'd tried the Almay stick eyeshadows (read those details, here...), and they didn't blend at ALL, and I admittedly expected the same from Rimmel.

I set the bar too low, as it turns out, because these colors stayed nicely, blended well, and layers together great!

Here's a few snaps. I ran out of daylight before I could get daylight snaps, so all of these are swatched indoors, which isn't great admittedly, but I did what I could do for you, right? :D


The product on. See what I mean? Blends really well, looks nice on.


The colors swatched on the inside of my arm. That's Bulletproof Beige closer to the camera, Paranoid Purple farther away. Bulletproof Beige could easily work as a highlighter in the Highlight and Contour step (for fair to medium skin tones. After a medium skin tone...probably not as much, hah!). Paranoid Purple also makes a nice eyeliner, if you sharpen the pencil to a nice point.

You know, had I been left to my original experience to decide whether or not I'd recommend this product to you, I'd give it a solid "...meh? Maybe?", but I was much more impressed with the product - in terms of wearability and longevity the second time around, so I'd give this a solid yes. This is an impressive product for the cost!

All that, and my google spell check is still in one piece!

Wednesday, October 15, 2014

We're back for Wet N Wild Wednesday!

We're back for a special Wet N Wild Wednesday, and we're talking eyeshadow!

I already pitted the Summer 2013 and Summer 2014 eyeshadow collections against each other once, here, and we're back for round two!

In this corner, "To Muse and Carouse!"

This trio is a nice matte sky blue, a matte tan, and a deeper matte brown tone.


The colors didn't have the payoff that I was expecting to see (I'll admit, I was a little nervous of the potential impact of that blue!), but they went on nicely, and blended well. In fact, when you see the color on me, you'll see it with primer, and it still didn't have a ton of color payoff. But, it's a nice set of neutrals, and you can never have enough of those, right?


In action. I try to take pictures outside when I can, but it was pretty rainy this week, so these are all taken in the light of the big window in my living room. You can see - nice, and I actually like how the color plays off my eyes a lot, but if you're wanting big, splashy color - this isn't your guy.

In this corner, from the Summer 2014 collection, "Who's Carpooling?"

This collection is a matte white, matte kelly green, and matte royal blue. And unfortunately, suffers from far FAR too much of a good thing.

These colors are all CRAZY pigmented. Make no mistake - what you see in that pan is what will show up on your eyelid. Which is FINE, if you need a great matte royal blue, or kelly green. And had I been in the market for either one, I would have been thrilled. As matte kelly green and matte royal blue go, they're top notch. Seeing this much fire power in a drug store brand is truly impressive.

But unfortunately, everybody doesn't want all fire power all the time. I was just telling someone else about this, and I made the comparison to cooking with jalapeno. You don't cook full blast, all jalapeno, all the time, right? That's kind of what this palate suffered from. It needed some...something to dilute it. A little shimmer never hurt nobody!

And as if parsing down all this fire power wasn't enough, there was the problem that the minute I tried to blend these to dilute them, they started going EVERYWHERE. Let me start at the beginning.

I use my primer (Fergie "Take On The Day", also by Wet N Wild), and apply the white all over. Things are going swimmingly. I decide to follow my own color scheme rather than the Wet N Wild suggestion (royal blue across the lid, green in the crease, white to the brow), and decide that I'll go green across the center of the lid, and blue on the outside. I battle through the FOUR safety stickers Wet N Wild applies, and finally reach the product. White all over, great. Dip my brush into the green, apply to the lid. Ooh, boy. You guys, I may as well have gone across my lid with a green sharpie. The colors beautiful, but WOW. So I panic, and decide I have to have a new plan. I swirl the green through the white, which gives me a bit of a lime color, some of which is now deposited on my undereye, despite my not-at-all-aggressive-blending, and decide I'm going to use a dense bristled eyeshadow brush, and the blue liner, to give myself a pseudo eyeliner line.

I finally gave up, and decided I didn't have time to play with this, wiped the entire thing off, and went to work virtually bare eyed. What a disaster!


In action, with the three pan shadow in question. Also taken in the light by the window in my house, because it's still rainy and gross in Michigan! :)

So the dilemma I had was this;

Summer 2013's entry, "To Muse and Carouse", is a generally solid performer. Not exciting by way of color payoff, nothing to get excited about by way of longevity, but otherwise, a solid entry.

Summer 2014's entry, "Who's Carpooling?", is a bit more erratic of a performer. REALLY exciting by way of color payoff, but the color drift also calls the longevity in to question too, right?

So, based solely on wearability, I have to give this battle to - Summer 2013! Of these two, I believe that "To Muse and Carouse" is the superior eyeshadow. If you could only pick up one, "To Muse and Carouse" would hands down be my recommendation!

Monday, October 6, 2014

I'm really conflicted this week!

This week, I took on the Almay Intense i-Color Shadow Stick. Actually, if we're being fair, I took on THREE Almay Intense i-Color Shadow Sticks. The blue eyed, hazel eyed and green eyed version. I'm really conflicted on what I think of them.

First, let's get to what we know;

These colors, like almost every other eye color in the Almay stable, is "matched" to you based on your eye color. You pick your product range according to your eye color, you're ready to go. This entry, the "shadow stick" is sort of like the Almay answer to the 5 minute face. Two shadows, paired easily in to one pencil form. Nice creamy formula, easy to use - if you learned to color in kindergarten, you can use this - no muss, no fuss.

Which is great, but the problem? If you're a person who wants some color BANG for the buck, these aren't your guy. These are nice, and soft, and go on smoothly and easily, but don't offer anything by way of exceptional color payoff. In fact, I had to swatch these on the inside of my arm, because I felt like you didn't even get much of a look at it, otherwise.

Let's go to the pictures!


The product shot. From near to far, you see the blue eyed version (a light bronze, with a darker brown. This was the highest pigmented one of the three). Then in the middle you see the hazel eyed version, a light pink, and a brown with a pink undertone. I found this one most lacking in terms of longevity. By the end of the night, it was virtually gone. And the farthest away one is the green eyed version, a silver with a cool toned purple. I found this one the most interesting, because that's not a combination you go to a lot.

More pictures!


The blue eyed stick, swatched on the inside of my arm. Pic taken in as much natural light as the overcast skies would allow me. :)


Blue eyed stick, in action. Not for nothin', but the red lip is courtesy of Jordana. Pretty magical, for the price, right? :)


Green eyes, swatched.


Green eyed stick, in action. I've been battling the elementary school plague, and I think you can really tell it in this picture. Also, there wasn't nearly as much sun as the blue eyed stick got. But, still. ;)


Hazel eyes, swatched.


I don't know about you guys, but I think my makeup game was on point on this day! ;)

So, my conflict is that these are all not like the others. The blue eyed stick is the best pigmented, and longest lasting. But the green eyed stick is the most interesting combination. And the hazel eyed version is...there? I think of the three, I'd recommend the green eyed version for interest (and it did the most to play up my own eyes) or the blue for the pigment and lasting, and I'd tell you to just all together skip the hazel version. That one's not worth it.

See you soon, my lovelies!

Wednesday, September 17, 2014

Another special edition "Wet N Wild Wednesday"!

It's time for another special edition "Wet N Wild Wednesday" here at the Big Blog of Beauty, and this time, we're talkin' eyeshadow!

Our first entry is from the Summer 2013 collection, called "I'm Seeing Triples!" Despite the fact that everything I can find online attributes this collection to Summer of 2013, I'm still actively seeing it in stores, right up to today. So if you were on the ball and got one last summer, but want more, you're in luck. I've recently spotted these at Rite Aid, and bought this one personally at CVS.

At any rate - this collection is a matte lime, aqua and pink color, and I was initially attracted to them because they're so far outside of what I'd normally wear! :) I used Fergie Take On The Day primer, but came up with my own color scheme, because the labeling that Wet N Wild provides to give you a hint on how to use the colors...well that was bravery taken a little too far. Lime up to my eyebrows was more than I was ready to commit to! So I went with lime in the inner corner, the pink across the mid section of the lid, and the aqua in the outer corner, as well as in to the crease.

This shadow goes on great - I've read some reviews saying that it was better to use the sponge applicator, that you'd get more color pay off that way, but I had no problems with the payoff that I got. I did alternate a bit between sweeping the color on, and stippling the color.

I honestly don't know that I'd rock all three of these together at the same time again, but I do like all of these colors a lot. They reminded me a lot of the HIP line that L'Oreal has been selling for a while, but bonus - at a fraction of the price!


The actual palate. Wet N Wild, as you can see, provides some handy labeling, if you're not one for figuring out how to use the colors for yourself. But, like I said - matte lime up to my eyebrows was a bridge too far, so I threw their rules out the window, and wrote my own. Makeup's fun like that. :D


Wearing the shadow, eyes opened and closed. The look, in action. Nice color payoff, great durability - hung in solid for five or six hours - and a unique look. I got a lot of positive feedback on this one!

Now we move on to my Summer 2014 selection, "No Scalpers Allowed!". On its face, this one was much more wearable. A light, pinky tone, a mid-tone matte purple, and then a deeper purple with a slight iridescent quality. Everything sounds great so far, right?

Color goes on smoothly, and pretty well - I used the same brush as I'd used for "I'm Seeing Triples!", as well as a similar technique of application. Fergie Take On The Day primer, and a combination of sweeping and stippling to apply the color. Color went on smoothly. Not as much color payoff as with "I'm Seeing Triples!", but that's alright.


Looks nice, right? I used Wet N Wild purple eyeliner pencil in this one, where I'd used black eyeliner in the other, but everything else you're seeing in the pictures is the same.

So, does it sound like I'm hedging my bets a bit on exclaiming over this one? Because I kind of am. I had one giant, giant problem with this one - drifting color. The purple - and I never got a feel for which, they seemed to blend together at this point - just spread, everywhere. I had to clean up my eyes twice before I could leave for work, and twice while I was at work. Where I got 5 hours of pretty impeccable wear from "I'm Seeing Triples!", I got about 40 minutes worth of wear out of "No Scalpers Allowed!", which was a disappointment, to say the absolute least.


For the sake of equal opportunity, a picture of the palate. It all looks so promising, doesn't it?

Of these two, if I had to make a recommendation, I'd recommend "I'm Seeing Triples!" Wears well, nice color payoff, unique - it'll for sure attract attention. "No Scalpers Allowed" has only mediocre color payoff, and was suffering from constant melt down, the entire time I had it on. Pass on "No Scalpers Allowed!", unless you're just so fond of purple eyeshadow that you just can't help it. :)

Monday, September 1, 2014

Confession...

A couple of nights ago, I had one of those big, ugly cries that girls are prone to having on occasion. And as a result, I've spent the last two days, tangling with puffy eyes, that felt like they were about to overtake the rest of my face.

Which is doubly bad, because not only is that not pleasant, but the one day I did try to put makeup on over all that puff, all you could see was my eyeliner!

So I spent today combating the puff. Pinterest is curiously lacking in tips for this sort of thing - most of the recommendations involved purchasing product. So I was sort of winging it on my own.

And for the sake of things, said puffery:


Pretty bad, right? Like, if it grew just a couple millimeters more, it could take over my eyelashes, level of bad.

First, I tried an eye cream, with a roller. I'm quite fond of Olay Fresh Effects Bright on Schedule eye roller (as evidenced here), so I gave it a shot. Felt great, didn't appear to do much to help.

Next, I even gave Allegra a crack at it. Figuring maybe I was having a reaction to something (last time my eyes swelled like this, it was because of Clean & Clear face wash - years later, when a dermatologist actually recommended Clean & Clear to me, I couldn't contain my laughter!). I actually feel like this helped some. My eyes were brighter, I didn't feel as foggy. This one was a bit unconventional, but it might have been worth something.

And then we turned to the ever popular torture chamber - SPOONS. Every website you read looking for tips, everywhere you turn - spoons. Put them in the freezer until they're good and cold, put them on your eyes until they're not. Simple, fool proof, everybody's got a spoon, right? I began dancing around my kitchen! This one was pretty brutal. And I really am not sure how effective I even think it was. I even proclaimed it worse than the Ice Bucket Challenge, and my eight year old went "Oh, it's not THAT bad...", haha...

And I resorted to that good old fashioned, cure all beauty trick - water. Lots and lots and LOTS of water. It seems super counter intuitive, but they always say that if you're retaining water, drink more, because it will start to flush out the water that's in there. I even went swimming, hoping that would help! When I was pregnant with said eight year old, I discovered that apparently, when I'm pregnant, I gain the super power of being able to retain water - simply by looking at it! Don't be jelly, ladies, haha! At any rate, my OB suggested swimming. He said that the water would put solid, consistent pressure on my body from all angles, thus forcing the retained fluid out of the areas that were retaining it. And I often said I think that man was super crazy, but I know he's right on this one! So I even gave that a shot!

So here's where my day of puffery battle got me:


Not bad for a days work, right? So maybe the spoons were worth more than I thought!

But here's a few more tricks that I found, just in case the spoons don't do it for you;

They say Vaseline works for everything, right? I'm actually planning on trying this one tonight, if I can remember where my vaseline is, haha!

Curiously, this website recommends mashed banana. I didn't get a chance to get to this one, but doesn't this just sound terribly messy?

The typical recommendation of cucumber. Potatoes actually got several recommendations, and curiously, so did soy milk.

I'm depuffed, and hopefully looking terrific for dropping my third grader off for school for his first day tomorrow. I'm not typically a first day of school crier, which I'll have to remind myself of tomorrow. Because sure as the world, I've said that, and I'll cry. I can't cry, I just spent a whole day depuffing my eyes from my last cry! Although I guess if I cry, I better stop off for a potato and some soy milk on the way home, right? :)

I'm also working up a special Wednesday edition of the blog, which I'm hoping to have live this coming Wednesday. Stay tuned for that! :D

Later, lovelies!

Monday, August 25, 2014

Here I go again, back on Pinterest!

Last week, I began rummaging around my cabinets, trying to decide what I wanted to tell you guys about this week, and I found this;


Which intrigued me, because...well, because I don't remember when I bought it, or why! So I figured if that wasn't a sign that it was time to test another Pinterest tip, then I didn't know what was!

I googled, and found this post, claiming to have "20 amazing beauty uses for baby oil", so I put them to the test. And I won't lie to you - there's not really pictures for this, you're going to have to trust my powers of description. There's no pictures, because some of them weren't that satisfying (the difference in a moisturized versus an unmoisturized arm is pretty subtle, in pictures anyway), some of them seemed pretty inappropriate (I didn't figure you guys wanted to look at me shaving my legs), and some of them were just ways I didn't want to be seen online (with yesterdays eye makeup smeared down my face...). So it's all descriptors here, which is lucky, because that's my strong suit!

So, the tips I tested, and my experiences with them. Ready? Here we go!

Tip:Use as eye makeup remover- just squirt on a cotton ball, swipe slowly across the eyelid and lashes.

Experience: As "luck" would have it, I tested this twice. I lost my mind for a second, and decided that 20 minutes before I needed to leave to be somewhere, when I was in every other way ready to go, would be a stellar time to try my hand at some cats eye eyeliner. Spoiler Alert: it so wasn't. So I dipped a q-tip in baby oil, gently swipped at the wing, blotted the oil away, and went on my way.

The next morning, I had to remove the rest of the makeup the cleanser didn't get off, so cotton ball, baby oil, and away we go! It did leave a thin film behind, so if that slight oil feel is something you won't be able to get on board with, beware with that one.

Verdict: It's a keeper! Baby oil is a great eye makeup remover!

Tip: Use as a cuticle oil

Experience: I turned to my toes to test this one out for me, and color me surprised and impressed to find out that this really worked! I've got chronic dry skin on my feet, and I was impressed with how much this worked on my toes - I've got a crack in one toe nail, and this actually made the crack look much improved. I know it's fairly cosmetic, but I was pleased.

Verdict: It's a keeper! Baby oil makes a terrific cuticle oil, and a great fix if you have chronic dry nails like my poor feet do!

Tip: Use baby oil to shave your legs.

Experience: This is where my testing kind of ran a little sideways. I've heard a lot of people praise this, not just the blog article I was pulling tips from. Y'all...I kind of hated this one. It gunked up my razor, I was constantly having to rinse it out, and the shave wasn't exceptional - the very next day, my eight year old patted my leg and went "Wow, your legs are kind of hairy...". Yeah. That happened. And the hair was oily, which made it stick to the wall once the water rinsed away, I actually had to scrub my shower after testing this one!

Verdict: Nope! Pass on this one.

I'm going to speak to this last one as a two-fer:

Tip: Use after shaving/ shower for super moisturized legs. Just don't dry legs before applying. And, Mix a drop of baby oil with your regular lotion for shinier skin and longer lasting moisture

Experience: Shinier skin? People will be able to see their reflections in you. I did this tip on my arms and across my chest, after I got out of the shower one day. I looked like I'd been polished to a high sheen. I was slippery! I've done this tip, when I had time to sit and let it absorb, and you do get very soft skin. But if you don't have time to let it absorb, you'll be in trouble. I finally had to blot, after a half hour, and continue getting ready.

Verdict: If you've got time for it, go on, but who's got time for that?!

So I tested four tips off Pinterest this week, and got two keepers, and two nopes. Not a solid batting average, but it could have been worse. The article recommended a few tips that I was outright scared to try - using baby oil on your face as a highlighter, and mixing baby oil in with your foundation to give a nice "glow", for example - but go on with your bad self, if you want to give it a shot. I'd think, especially in the case of mixing in the oil with the foundation, would be something you wouldn't want to do unless you had dry skin.

I have memories of my mamaw, when I was little, smearing herself with baby oil, and going out to lay out by the pool. And I remember thinking how crazy awesome and glamorous that was. Of course, I do not - not even a little bit - recommend that one. :)

Monday, July 14, 2014

This is like a three-fer of beauty information today!

You just can't pay for this sort of entertainment!

So today, I'm testing not one, but TWO tips from pinterest, as well as showing you a Revlon Colorstay eyeshadow quad.

Let's get to the action!

First tip that we're testing is what I've affectionatly dubbed the "Insta-brow lift". Groom your brows as you wish, apply a small amount of concealer above the brow, and a small amount below, and you'll get the insta-brow lift effect.


Now, this pic isn't today, but this is just an idea of what I was working with. This was the after;


I don't even think this picture does it justice you guys, I was really excited with this little trick. I'd do it again. I used a wand concealer (Wet N Wild Cover All if you're intrigued...), three dabs in the arch, three dabs above the brow, gently blended. I'll try to get a better picture of the results (I can do pictures of the pricess too, if you're so intrigued, but it seems pretty self explanatory...).

The second trick I tested was scotch tape. Yes, scotch tape. Trick being - if you're someone who tends to go a little wild with your eyeshadow, and it runs off the edges of your eyes, take a piece of scotch tape, and tape from the outer corner of your brow to the outer corner of your eye. And any color that might make a mess on the outer corner of your eye will instead be on the scotch tape, and bingo-bango, perfect eye makeup.

This is among the weirder tips that I've tried, but I actually really liked this one. I do have a tendency to run off the edges a little bit - in the crease is a particular weakness - and being able to simply peel away the tape, and the mess was gone, was fantastic! I don't know that I'd do this every single day, but if I were going to a special event, and really wanted my makeup to be on pointe, you bet I'd whip out a little tape!

And lastly, Revlon Colorstay Eyeshadow. This color quad was named "Bombshell", which I'm not even totally certain they make anymore, because I haven't seen it in the store in a while. White, yellow, a metallic grey, and a darker grey. Check it;


The white and yellow colors were a little on the flaky side, there was a lot of fall out from the two of them. The grey shades went on smooth and silky, they were nice to wear, and actually looked really nice together. And speaking of together, let's talk about that - this is an odd combination of colors. That's actually what drew me to it. But if you follow Revlon's instructions, the yellow gets completely washed out. Well why use it at all, then? Why not put in a different shade?

Speaking of instructions - if you like a nice smokey eye, but you're a little shakey on how to do it, Revlon includes a handy little instruction sheet, right on the back. All four colors, and right where they go on your lid. It's handy, and guarentees a nice look, don't be shy with it! And of course, if you're more adept with a smokey eye, go crazy, do whatever look you like! :)

Some pics. And I goofed these a tiny bit, because I didn't check the light before hand. That light across my nose is the sun coming in from the window in the bathroom. Haha...


Eyes open. Nice, right? I used Wet N Wild Fergie eyeshadow primer - which by the by, is fantastic - underneath, and there was the before mentioned concealer on the brow, and then the shadows. I'm pretty happy!


Eyes closed. See what I mean about the yellow? It's in the corners - in fact, there's probably extra yellow. And nada. You've got to really look for it. That's disapointing, for sure.

So I'm really happy with my tricks, and just as happy with the eyeshadow. I didn't get the 8 or 10 hours or whatever they promise - in fact, I barely got my aunts birthday party - but it wears and looks really nice, so I have no problems with it. I'd recommend it to a friend. ;)

And speaking of, look at that! I just did that! :D

See you later, gorgeous!

Monday, June 16, 2014

Look at my WILD lashes!

Mascara is one of those products where it's pretty tough to reinvent the wheel, even though everybody claims that they have. Think about the advertising for mascara - everybody is always claiming that their's is the latest, greatest thing in lash building, lash curling, lash darkening technology. And they're usually good, but they usually never live up to their own hype.

Now, having said that? Let's talk about this.

Wet N Wild Megavolume mascara. With it's cheerful, bright yellow tube. I especially appreciated the packaging, given my black, overcrowded makeup bag. :D

This mascara promises a 5x increase in the natural looking length and volume for your lashes.

Y'all, I kid you not - it delivers. This is one of the first mascaras that I've ever seen that does exactly what it says it will. The brush is wide set, and the formula is thick, goes on without clumps, and both dries and builds well. Really impressive, especially for the price!

I will say though, that this doesn't even play at pretending that it's waterproof - I washed my face with this on, and washed around my eyes, and still had racoon eyes when I stood up. This takes another round with the makeup remover, for sure.

I do alot of the picture taking for this blog with my iPad, and I downloaded a collage app over the weekend, so rather than show you five different pictures, you can see most of what I'm trying to show, all in one shot. :)


The product! You can tell, a tube that bright would be easy to spot, for sure! :)


The collage, so you can see the mascara in action. The bottom right square is no mascara at all. You can tell in all the others, even the one with the heaviest liner, that there is a definite increase in definition, length and volume in my lashes.

I don't often buy the same mascara twice, but I would definitely give Wet N Wild mascaras a second look! Try them out, you might be surprised! :)

Later, beautiful!

Monday, May 26, 2014

It's "Test a tip off Pinterest!" Week!

This week on Pinterest, I read a tip from a makeup artist that said that people should be wearing PURPLE eyeliner, because purple will help the eye pop, better than black or brown liner. I went "What, really?!", and promptly went out to look for some purple liner to test this little tip out for myself.

To make sure that it was genuinely my eyeliner that was making my eyes pop, and not my eyeshadow, or something of that nature, I kept all my makeup exactly the same over the course of this little experiment.

My little helpers:


From top to bottom, we have;

Boots No. 7 eye color duo in "Royal". It's a gold, and what I think is purple. And I say "I think", because it's one of those shape shifter colors. In certain lights, it looks like a real deep purple, in certain lights navy, and on my pale skin, it looks black. It's really rad. I think they've changed up their products, but I hope that's one I can find again.

Rimmel Scandal-eyes mascara in black. While I do like it (and I do - goes on smooth, doesn't clump, regardless of how many layers I put on), it's not as exceptional as Rimmel would probably want you to believe. Everybody wants to talk about their mascaras like they're exceptional...they aren't.

Rimmel Scandal-eyes eye shadow stick in Paranoid Purple. And if you'll let me go off on this one for a second - this one had a CRAZY tight lid. I'm perfectly healthy, getting that liner off shouldn't have been that hard! And I got halfway through lining my first eye, and the point BROKE. And of course I can't find a sharpener to keep going, so I end up painting the shadow on with a q-tip. Irritating, for sure! I'd be a little bit pressed to buy another one of these, even as much as I liked it, just because of all the trouble I had with it!!

Rimmel Scandal-eyes waterproof Kohl-Kajal eyeliner in black. I got this in a GWP with the mascara, and this, I like. It's like the kid sister to the new L'Oreal eyeliner that's out right now. Nicely pigmented, long lasting. I feel like I'd buy this one again if I ran out of it.

Lastly, Wet N Wild Color Icon pencil in Purple. I let myself get a little intimidated by this one, and I really shouldn't have. The pencil makes this look like it was a REALLY vivid purple, and I kept looking at it, and getting eighth grade royal blue eyeliner flashbacks (we were all there once...), and talking myself out of wearing it. In reality, it's a nice royal purple, and wears nice. It was much better than I had imagined, which is always a pleasant surprise. :D I'd buy this one again, for sure.

So I tested this out three different ways;


Just purple. This is the Rimmel purple, because I hadn't yet convinced myself to go Wet N Wild. And I had quite the Murphy's Law experience with this one (I already spoke to some of it, in my description of the pencil, so I won't go over it again, haha...), but I'm not disappointed. My eyes are blue, and I felt like the purple actually made them look lighter, and greener, which was a surprising development.


This is the Rimmel black liner, with the same eyeshadow/mascara combo. There's nothing to hate here, but you don't get quite the same POP that you get from the purple.


This look was the purple and black put together. I used the Wet N Wild purple this time, rather than the Rimmel purple. I put together the entire look, with the black liner, and then drew the purple liner, up over the top of the black. This might have been my favorite look of the three. At first, when this was fresh, this felt like an absurdly large amount of makeup - then as it settled in to my skin a little bit, and was a lot happier with it.

I know sometimes Pinterest can be full of craziness, and impossible to duplicate tips, but I think in this case, there's no disputing - the purple does in fact pop the eye (well, my eye anyway), better than black does. Purple! Who knew, am I right?!

See ya later, gorgeous!